This is how I converted a 120 euro ($140) Late 2015 iMac 27 inch into a 5K monitor, and saved myself at least 1,000 euros ($1,200). The write-up started life as a README on GitHub; this is the same material, tidied up.
It is based on the work of the community at the MacRumors DIY 5K Monitor Success thread.
Thank you to the DIY 5K community#
This project would not exist without the tinkerers in the MacRumors DIY 5K Monitor Success thread. The contributors whose knowledge helped me the most:
- @PaulD-UK: too many great posts to count. Countless diagrams, wiring tips and practical wisdom.
- @Regulus67: always helpful answering questions, and very patient with newbies.
- @Aiwi: deep dives and detailed project logs that demystified the R1811. His own build is on GitHub at aiwipro/5K-iMac-Studio-Display-Stock-Look.
- @ItsAShaunParty: created the DIY 5K at MacRumors GPT for ChatGPT.
If you are diving into this project, browse the full thread before asking people questions.
How this write-up works#
Rather than show my successes and say “Tada!” like a magician pulling a rabbit out of a hat, I wrote this as I was doing the project, failures and false paths included. Strikethrough text means I made a mistake or chose a different path. Hopefully that is more useful to others than a completely linear success story.
Why I did this#
I recently bought a 3D printer and went looking for a larger monitor to use with my 2020 MacBook Pro M1 and Fusion 360. There are lots of affordable 4K monitors, but the scaling of text and details on them has always looked off to me on a Mac. So I started looking for 5K monitors and was surprised to find… not much. What exists is hugely expensive. While searching for 5K monitor reviews I found the MacRumors thread, and my life changed for the better.
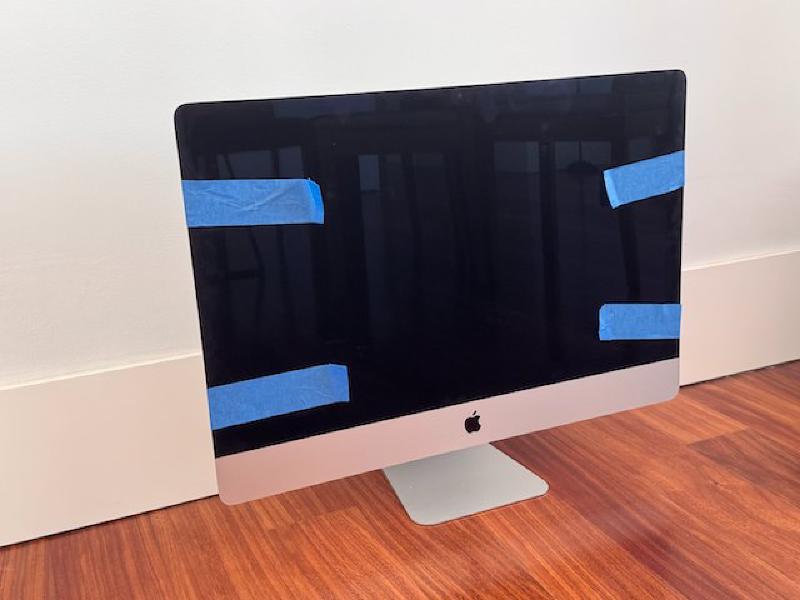
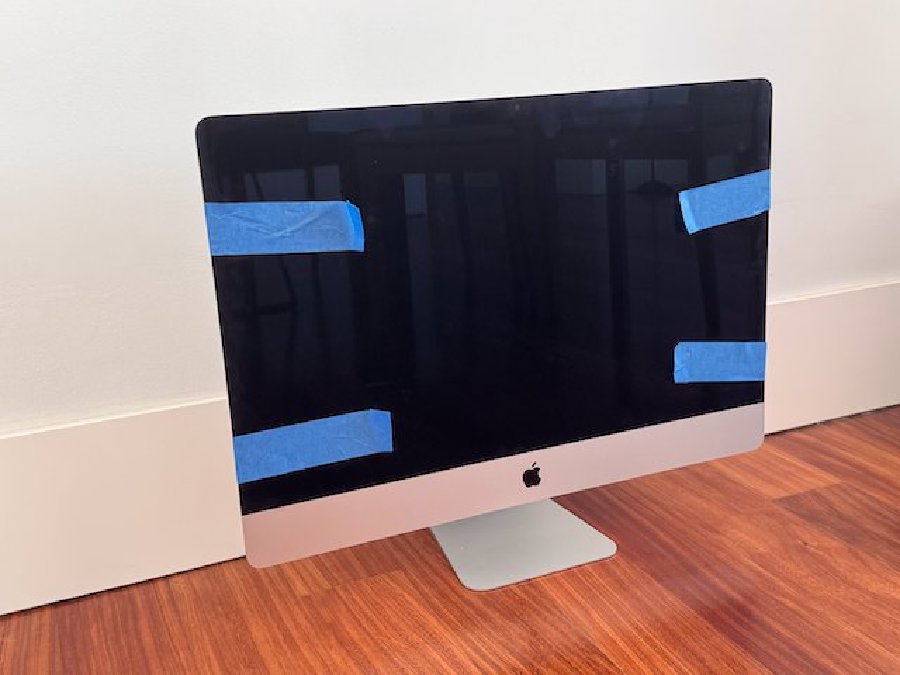
I searched for used 27-inch iMacs on Wallapop, Spain’s eBay. Imagine my surprise when I found a Late 2015 iMac 27 (A1419) with a dead logic board for 100 euros. The seller said the screen worked fine before the logic board died, and that a shop had quoted a repair that was too expensive. I took a gamble, betting that both the seller and the technician were honest.

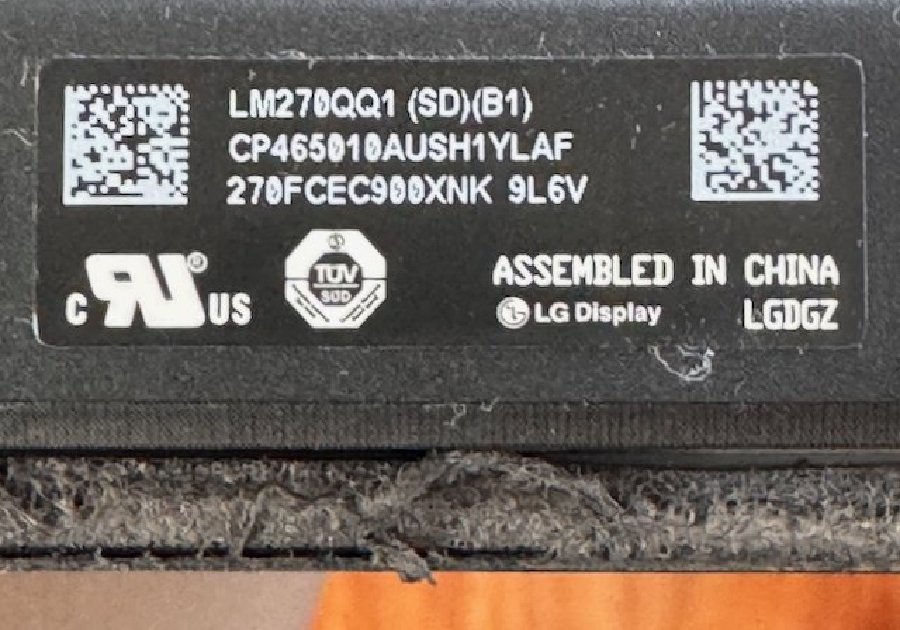
When the package arrived I found an LM270QQ1 (SD)(B1) panel. Of course, without a working logic board or a display driver board I had no idea whether it worked. I called my new possession the “Mystery Mac”.
What did I want from it?#
With the iMac bought and the panel identified, I had to choose a driver board and the rest of the parts. Before that, the requirements:
- No audio. I did not want to enable the iMac’s built-in speakers. People on the forum were having issues with them, and I am designing a 3D-printed 2.1 sound system anyway.
- No webcam or mic. I already have an Obsbot Meet SE webcam with better video than the iMac’s internal camera, and the forum members seemed to have a lot of trouble making a good internal mic solution. Little value for a lot of work.
- No USB-C charging. I have a CalDigit TS3 Plus dock and want the dock to charge the Mac. The catch is that the dock can only pass 5K through its USB-C / Thunderbolt ports, and I did not know whether that would make the driver board try to charge the Mac through USB-C Power Delivery. If so, I would connect the Mac to the monitor with a separate DisplayPort 1.4 cable.
- What I learned later: in the Mac to Thunderbolt cable to monitor direct configuration, with no dock, the driver board does try to power the Mac, and the supplied power supply is too weak for that (see the flicker section below). Connected directly, I need a USB-C to DisplayPort cable from the Mac to the board. Confirmed only for the direct configuration.
- The Mac to CalDigit dock to Thunderbolt cable to monitor configuration still needs testing.
- Silent.
- I kept the iMac’s internal case fan. The case was designed to pull air in through the back with the centrifugal fan and push it out the bottom, which helps cool every board inside. The cons: it needs a 24 V to 12 V step-down converter, and it limits where the R1811 can go if the inputs are to stay accessible. I already had a Noctua NA-FC1 fan controller to dial the RPM down to silent.
- The R1811’s own fan gets a resistor. The board ships with a fan that people find noisy. I tested Noctua NA-RC7 Low-Noise Adaptors from another project and they work; I used 180 ohm 2 A resistors that I have on hand to replace them.
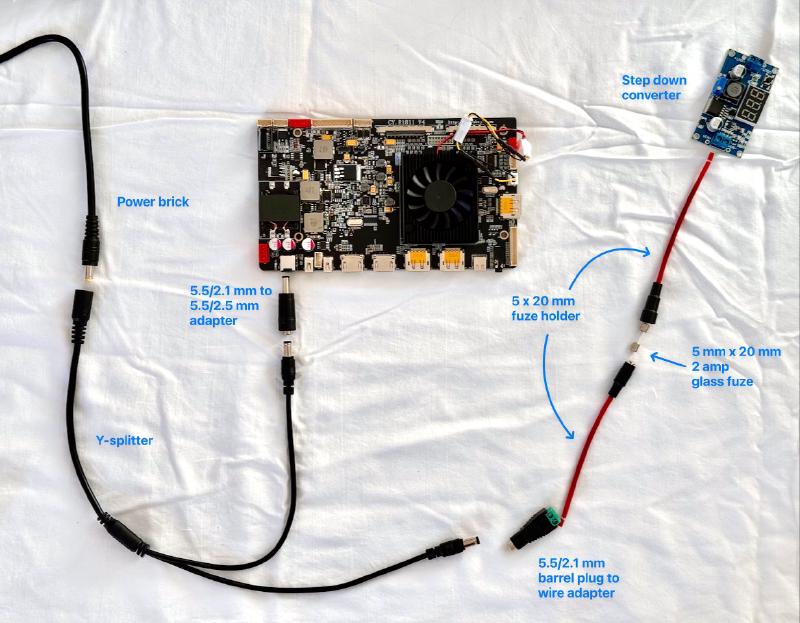
- External power supply, so it does not heat the inside of the case. Stonetaskin’s is 24 V 5 A with a 5.5 mm / 2.5 mm barrel plug. Charging a laptop through USB-C PD would need more amperage, and I do not want that anyway.
- IR remote. I hate reaching around a display to change settings. I want a remote I can point at the front to reach the driver board’s OSD.
Which driver board, and from whom?#
Bottom line up front: the R1811 V4 with DP 1.4 and HDMI 2.1 and the companion DZ-LP0818 50 W constant current board, both from Stonetaskin.
Why the R1811, even though it is the most expensive driver board:
- It gets more frequent firmware updates than the other boards.
- Users in the thread report fewer issues and quirks with it.
- It comes with an IR remote and a power supply.
- The optional DZ-LP0818 board can raise the backlight brightness if needed. I bought it because I did not know how many hours the 2015 panel had on it, or whether the backlight had dimmed.
I bought from Stonetaskin because of their reputation on the forum, and the decision was confirmed when their online chat turned out to be quick and helpful during the order. The two boards arrived in Spain 8 days after ordering.
What did it all cost?#
Prices all-in. Shipping from China was free.
| Item | Price |
|---|---|
| Late 2015 iMac 27 A1419, dead logic board, Wallapop, delivered | 120.28 € |
| Stonetaskin R1811 V4 driver board, Package B (board, control strip, IR remote, 24 V 5 A supply, cables) | $298.00 |
| DZ-LP0818 50 W constant current board | $36.30 |
| Barrel splitter, 24 V to 12 V step-down converter, JST connector kit (Amazon.es) | about 25 € |
| Two 180 ohm 2 A resistors for the R1811 fan | 0.50 € |
| Noctua NA-FC1 fan controller | already owned |
Call it 450 euros for a 5K display. A new 5K monitor starts at four times that.
Gutting the iMac#
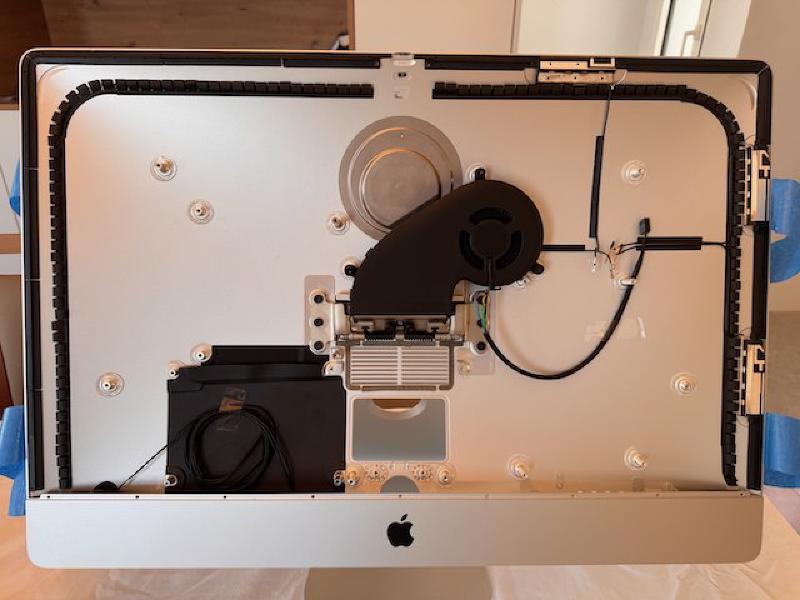
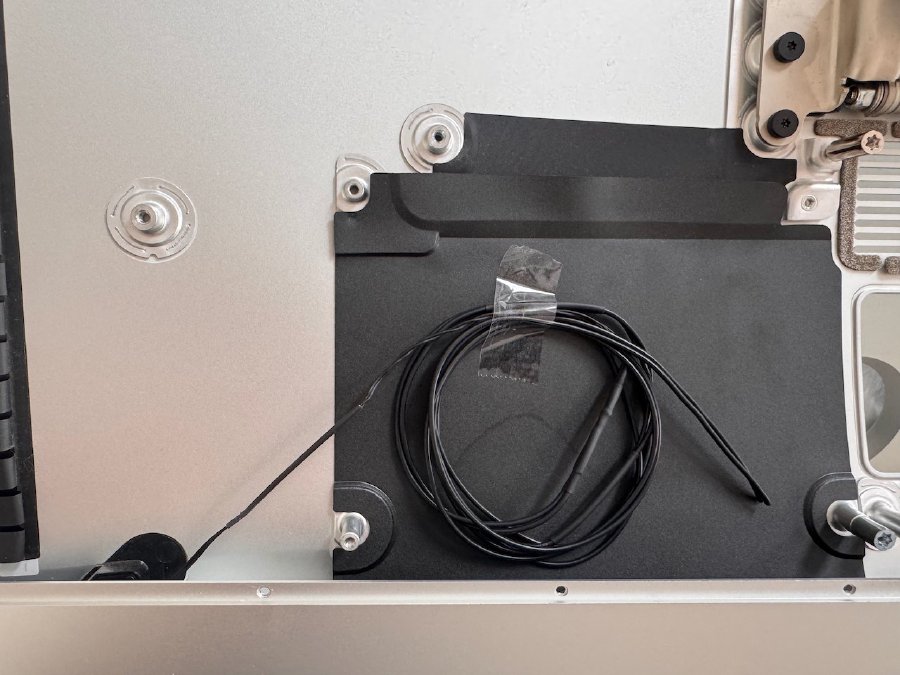
I pulled out nearly everything, because I am not reusing the speakers. The case did not come with a RAM cover, so I will 3D print one later. I removed the AC power socket because the power brick stays outside the case.
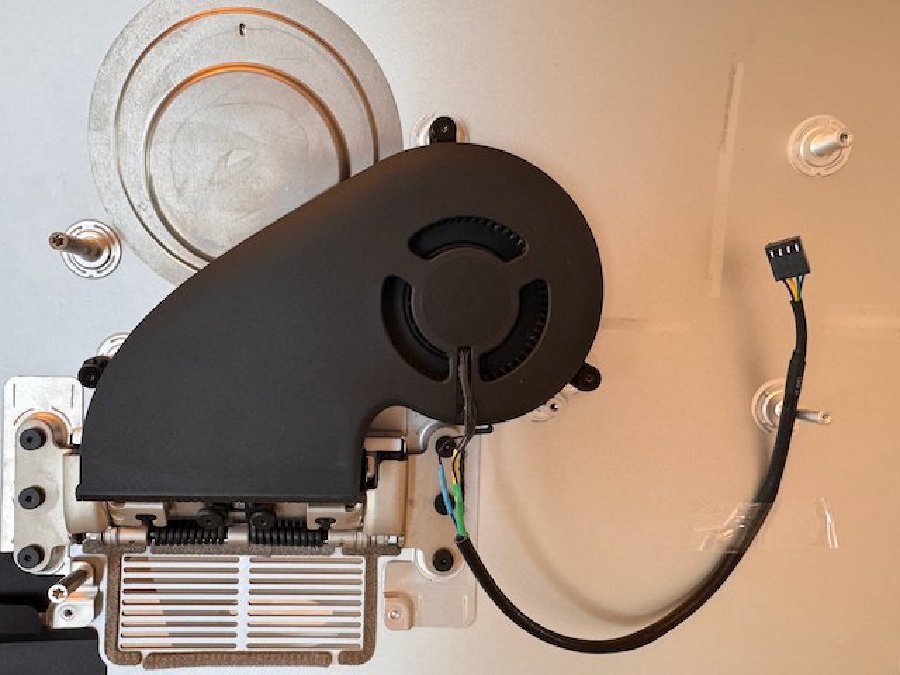
- I kept the case fan and soldered longer wires onto its leads for the Noctua NA-FC1 controller.
- I left the power button and extended its wires, to attach later to the on/off button of the R1811 control strip.
The teardown itself is on iFixit: iMac Intel 27-inch Retina 5K Display logic board replacement. An iFixit toolkit was very helpful. You need T5, T8, T10 and T25 drivers plus an extension, for one screw that sits below the logic board and is reached through a hole in it. On the A1419 that screw is a T8, not the T10 the iFixit guide says. There is more on this in the MacRumors thread.
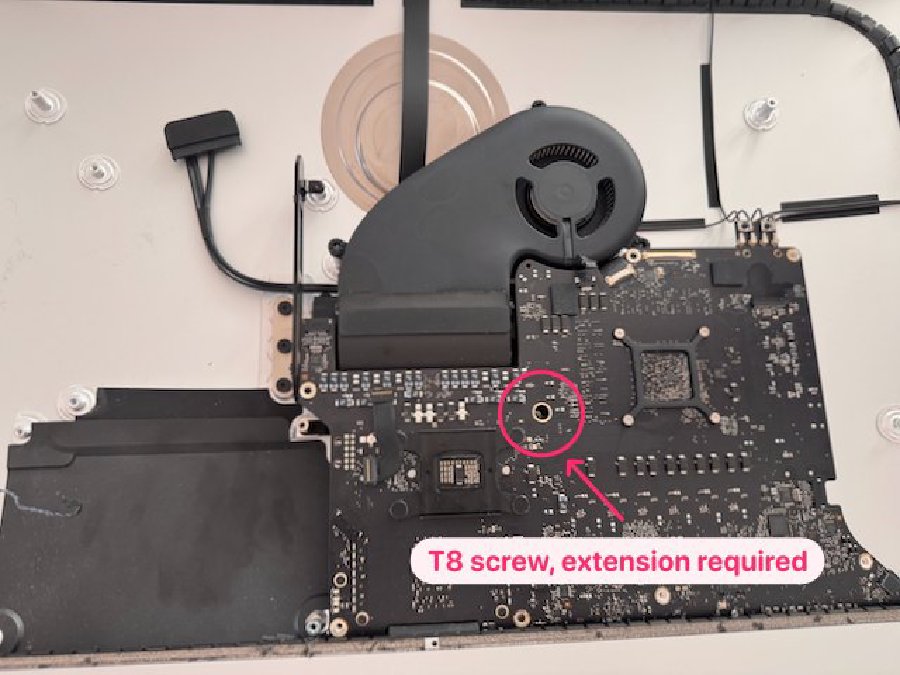
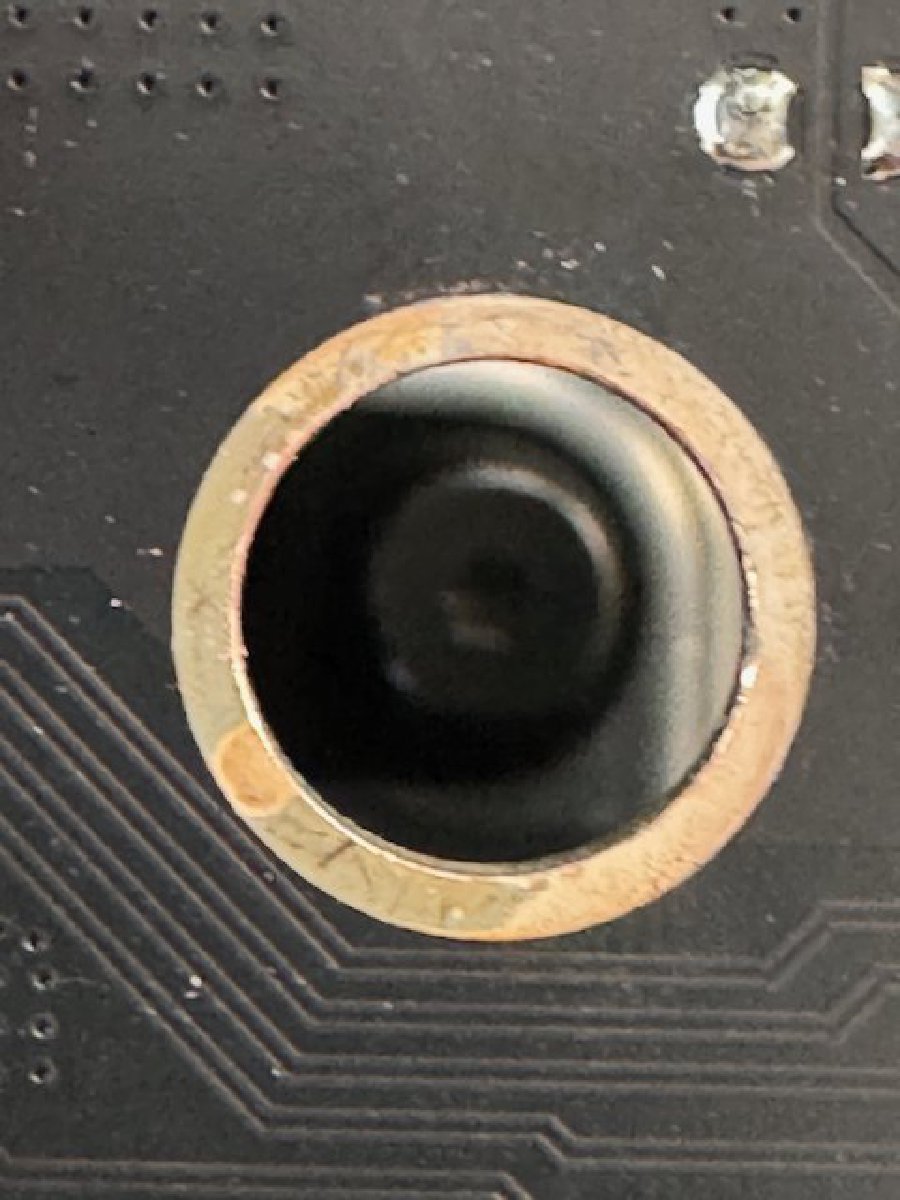
While pulling parts I noticed that both the logic board and the power supply had damage that looked like arcing. Now I was not so sure the panel would work.
Setting up the first power-on test#
The plan was to test the panel with the R1811 alone, and add the DZ-LP0818 backlight board only once I knew the R1811 and panel worked.
Connecting the R1811 cables to the panel#
The display data cable is finicky to seat. A couple of YouTube videos helped.
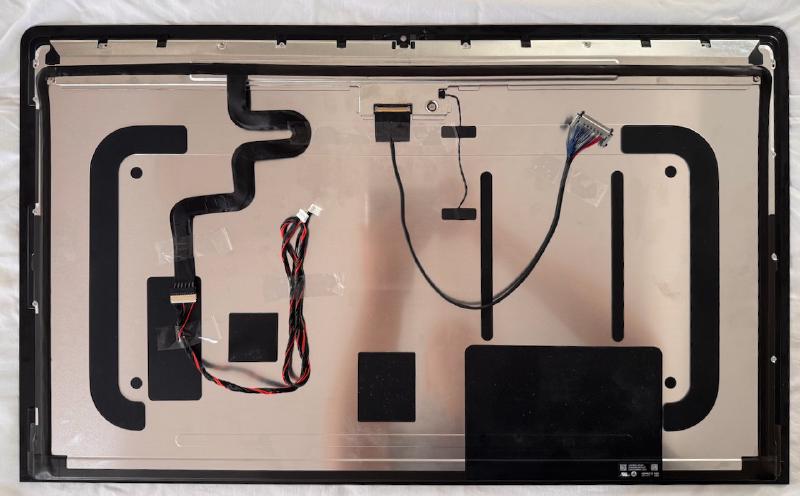
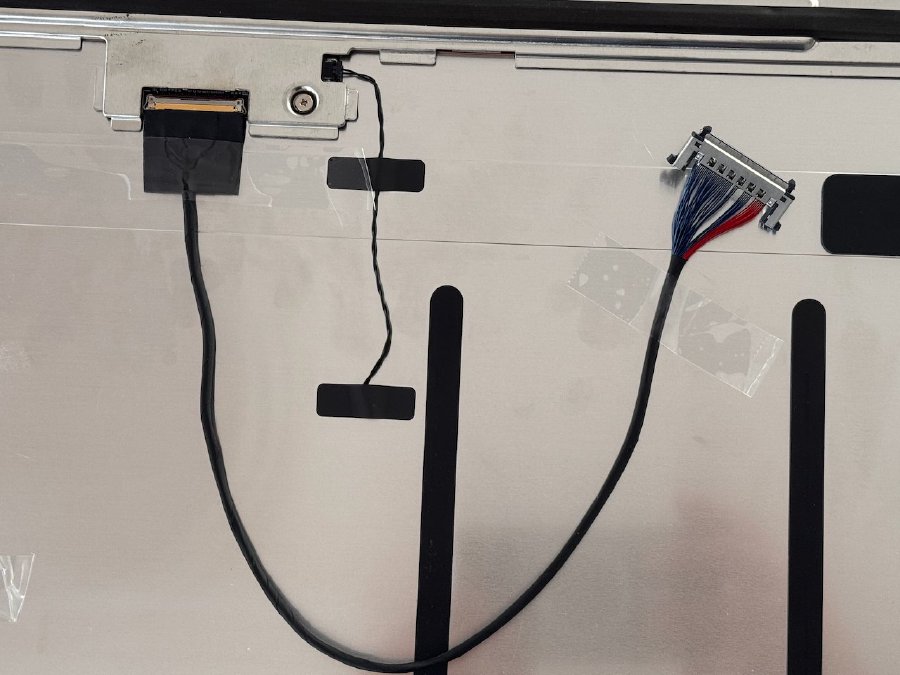
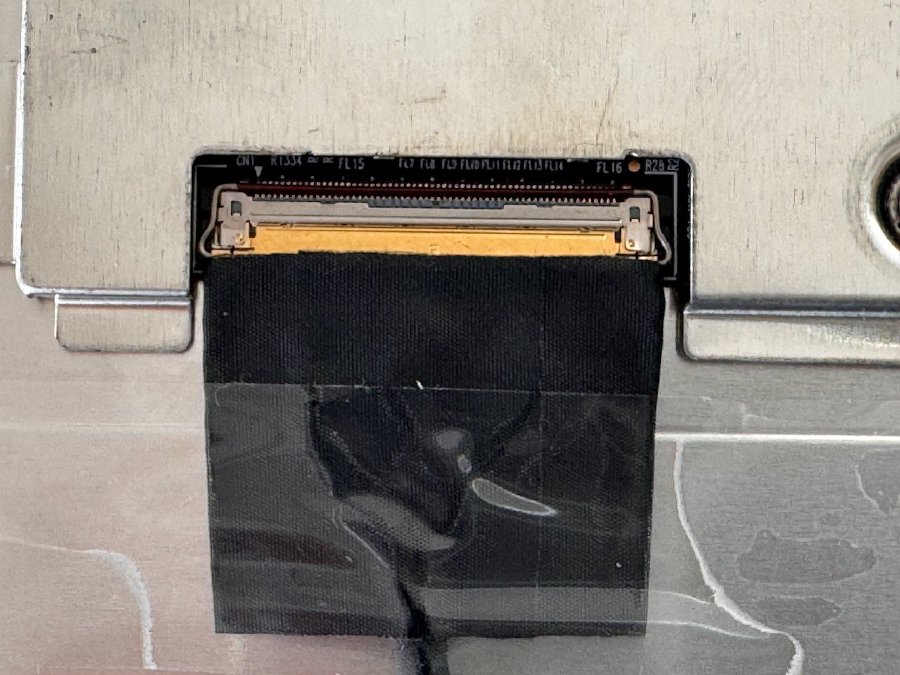
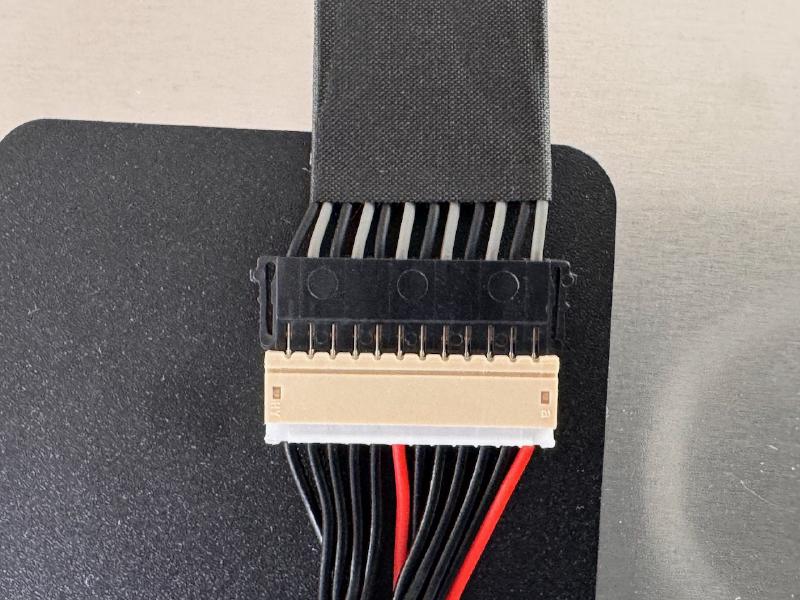
Orientation matters. The black-circle side mates with the white side that has the line and the recesses left and right. There is more guidance in the forum thread. If you connect it backwards the backlight will not come on, but apparently you will not fry anything.
Connecting the R1811 to the panel#
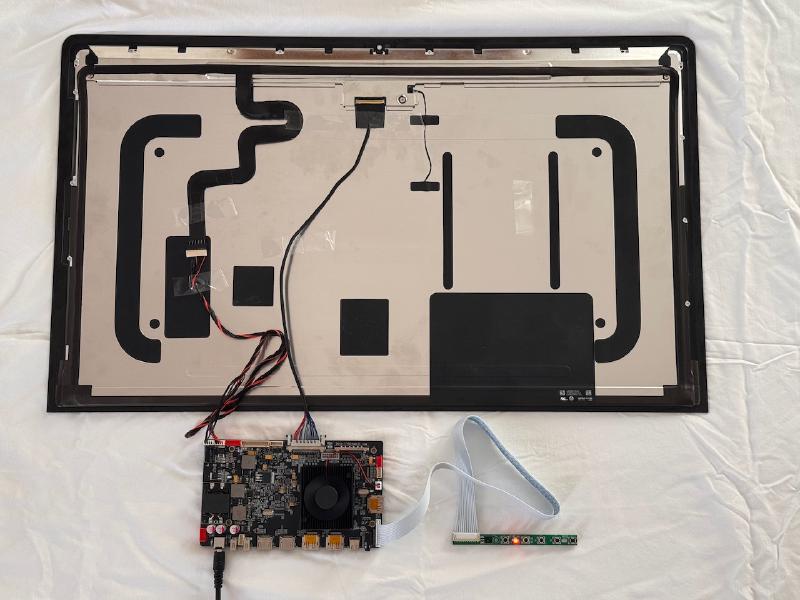
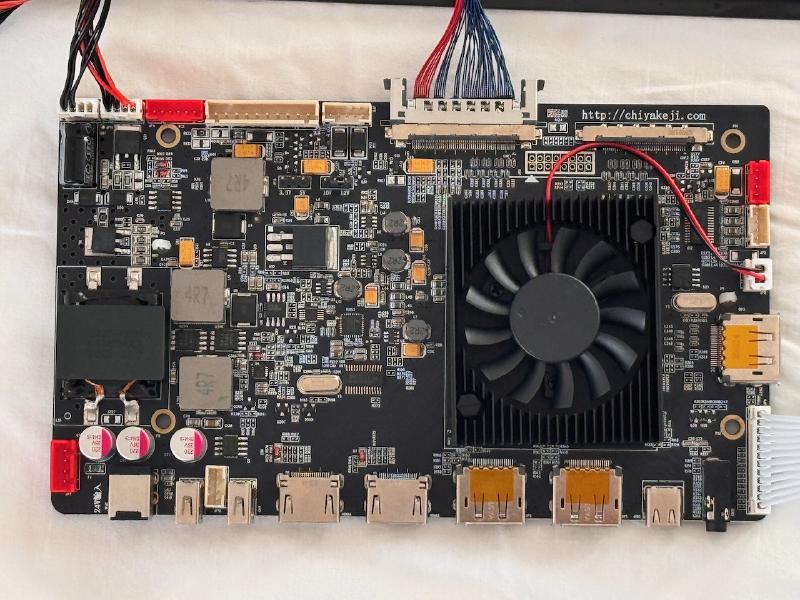
Power up: the panel works#
OSD! I flipped the panel over and propped it up on foam blocks so I could see it.
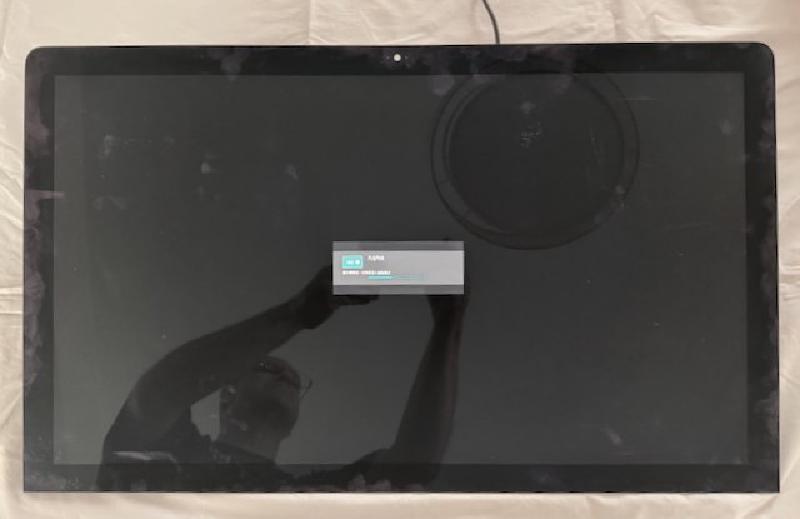
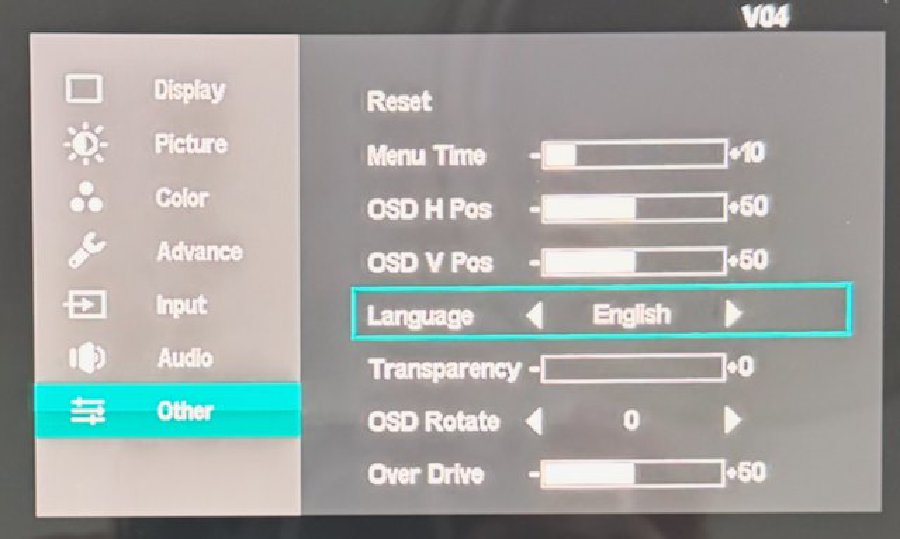
Changing the OSD to English#
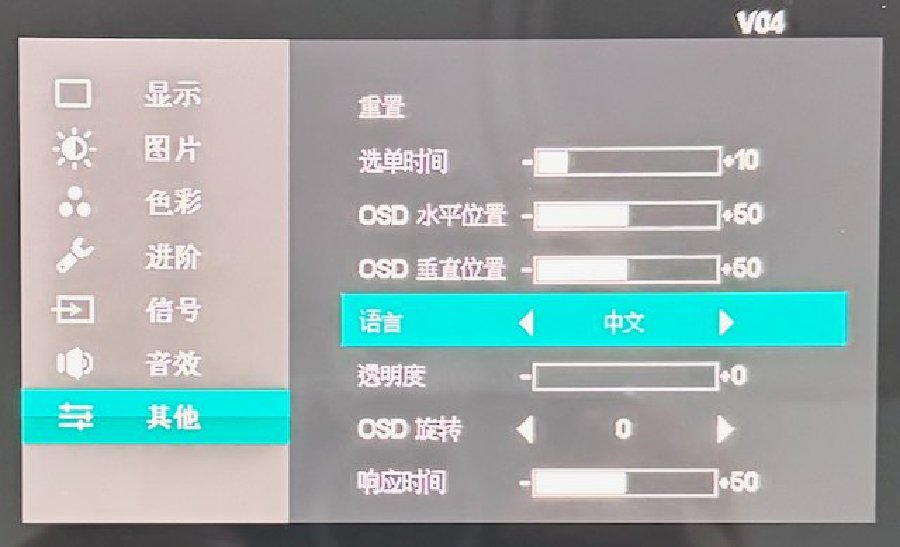
Verifying 5K from the Mac#
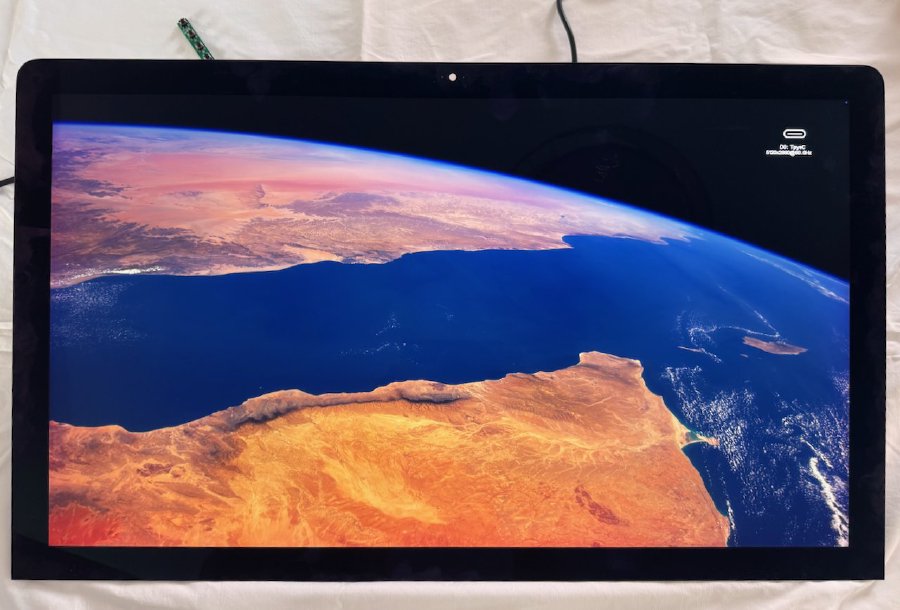
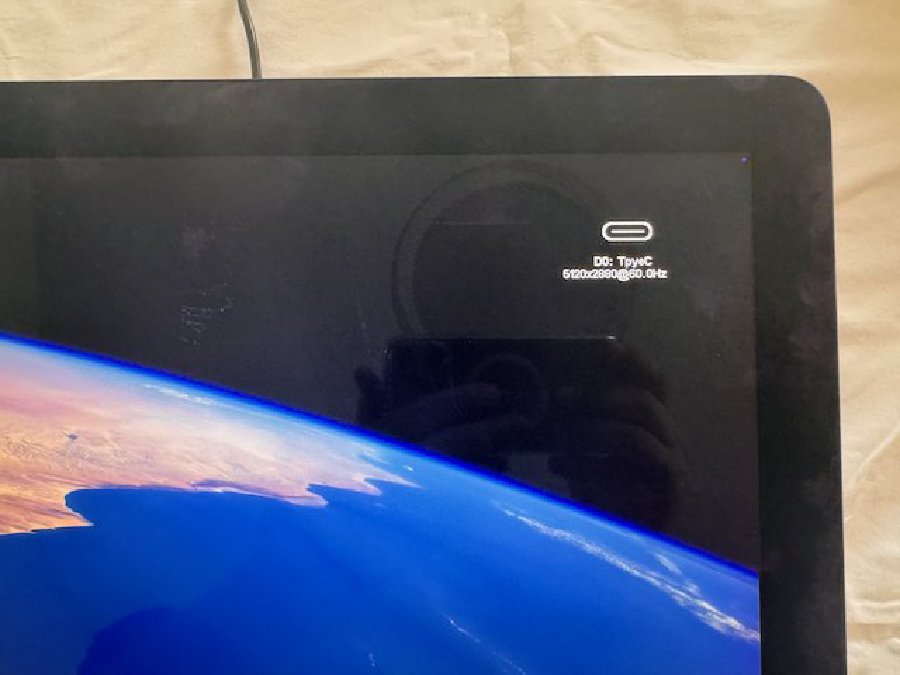
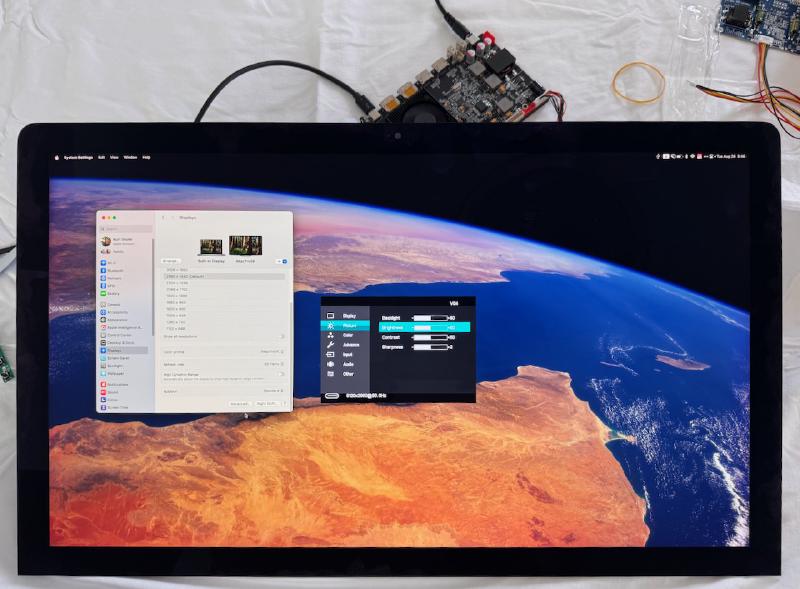
I connected my 2020 MacBook Pro M1 with a Thunderbolt 4 cable I had around. Both the OSD and macOS show 5K.
USB-C Power Delivery and screen flicker#
At this stage the screen flickered, which was disheartening. I eventually realized that the MacBook was drawing power through the USB-C cable from the driver board’s 24 V 5 A supply, even though the MacBook was plugged into its own power supply.
If you connect your computer to the R1811’s USB-C port with an underpowered supply, the board tries to power the computer and the display flickers. Stonetaskin’s 24 V 5 A supply is fine for the panel alone but cannot also feed a laptop. Two ways out:
- A USB-C to DisplayPort cable instead, which gives full resolution without drawing power from the monitor’s supply.
- A bigger power supply, like one of the Mean Well units discussed in the forum.
I did not want Power Delivery from the monitor anyway, so a USB-C to DisplayPort cable fixed it. No more flicker.
Pink edges on 2015 LG LM270QQ1 SD(B1) panels#
My panel has the pink edge coloration common on LM270QQ1 SD(B1) panels, explained in the thread here. It does not occur on 2017 and later iMacs with the SD(C1/D1/E1/F1) panels.
On mine the pink shows against a white or gray background near the edges, as a translucent gradient, darkest at the edge and gone about 2.5 cm (1 inch) in. Noticeable, but not a deal-breaker at this price. If I do another conversion I would probably go for a 2017 iMac 27, even though those sell for 350 to 400 euros on Wallapop.
Adding the DZ-LP0818 constant current board#
This board supplies and maintains extra current to the backlight. Backlights dim as they age, and this is the fix. Since I had already bought it, I installed it.
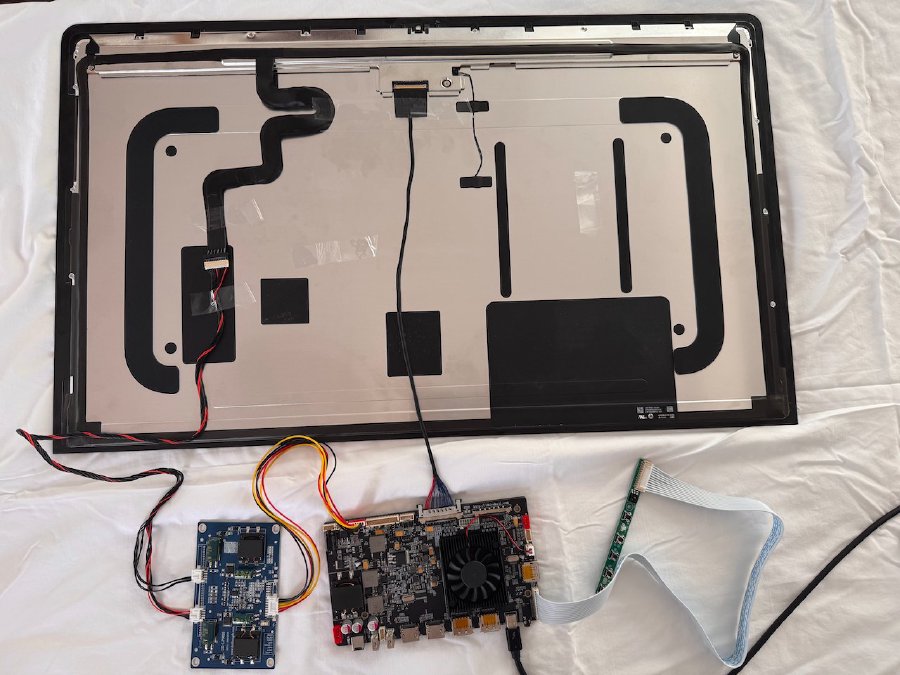
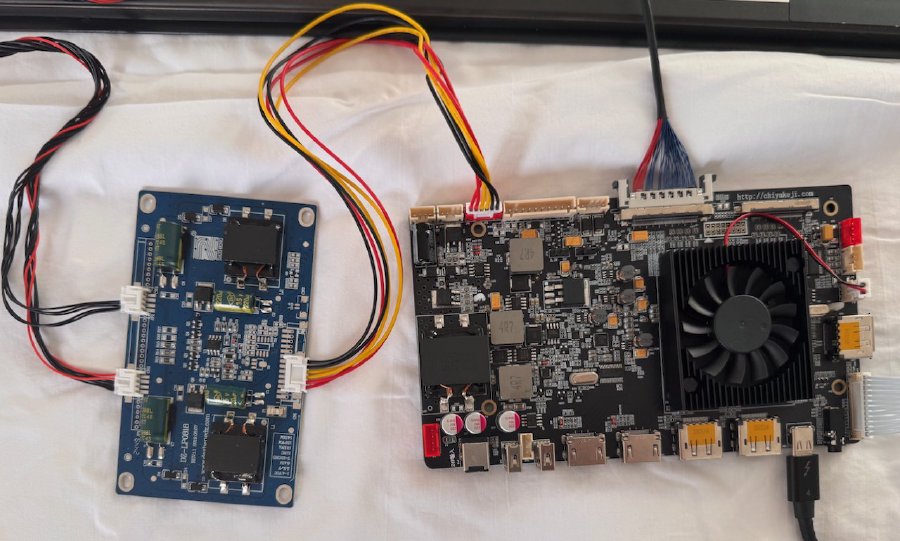
I also tried USB-C power again with the constant current board in place, to see whether the flicker went away. It does not.
A color profile with the Datacolor Spyder5#
Using the Spyder5 was a pain because it is no longer supported and the software did not work well on my Mac. I did make a profile that looked better than the “iMacPro5K” one macOS assigned when the panel was first connected. More on this once the internals are finished.
Quieting the R1811 fan#
To cut the fan noise I added resistance to drop its voltage. First with two Noctua NA-RC7 Low-Noise Adaptors I had lying around, connected in series with the fan using JST XH-2P connectors from this kit. That is what the photo shows. I later replaced the Noctua adaptors with two 180 ohm 2 A resistors, 25 cents each, wired the same way. I need JSTs for another project, so this was practice. I have fat fingers and bad eyes.
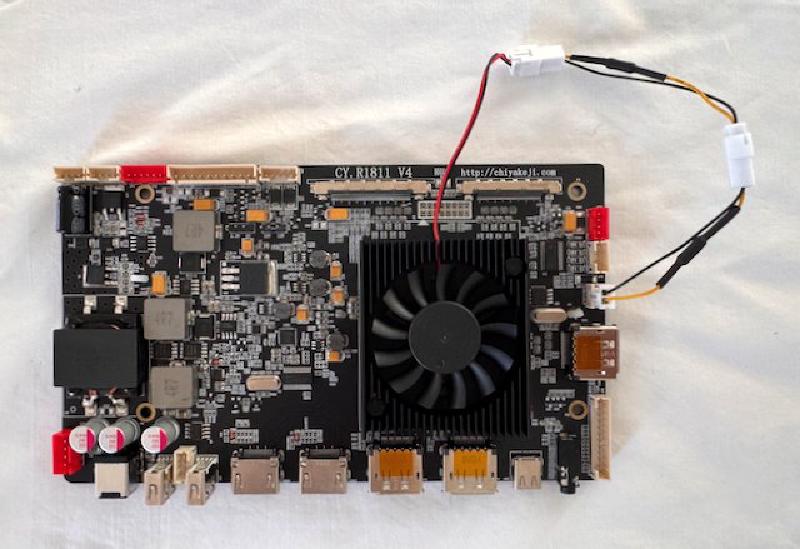
The fan is now nearly silent.
Powering the iMac case fan#
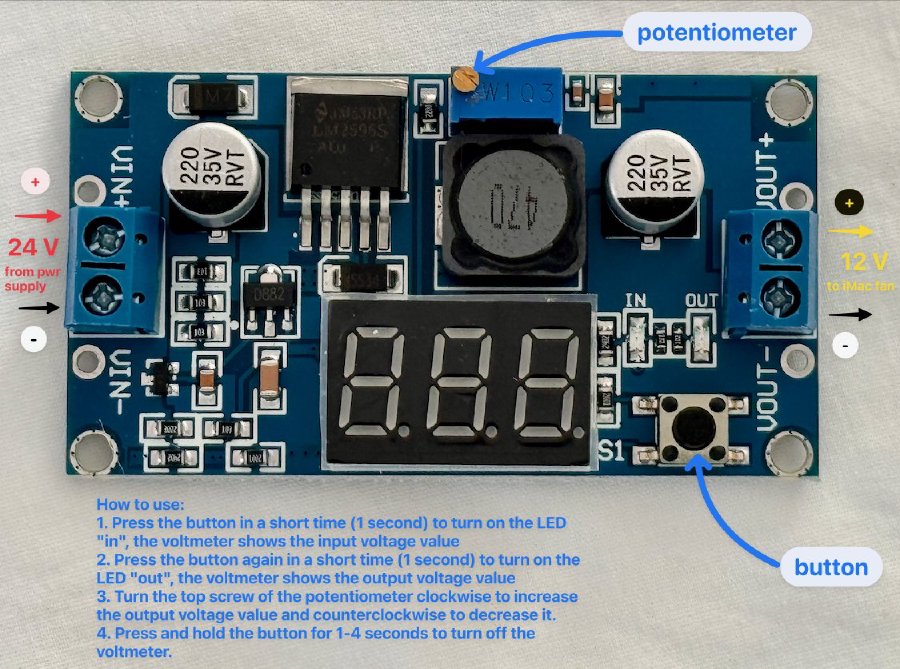
The case fan had its extended wires; it needed power. Rather than tap the 12 V pads on the R1811, I split the output of the 24 V brick, added a 24 V to 12 V step-down converter (with a fuse between it and the brick, just in case), and the Noctua NA-FC1 controller.
The barrel plug size trap#
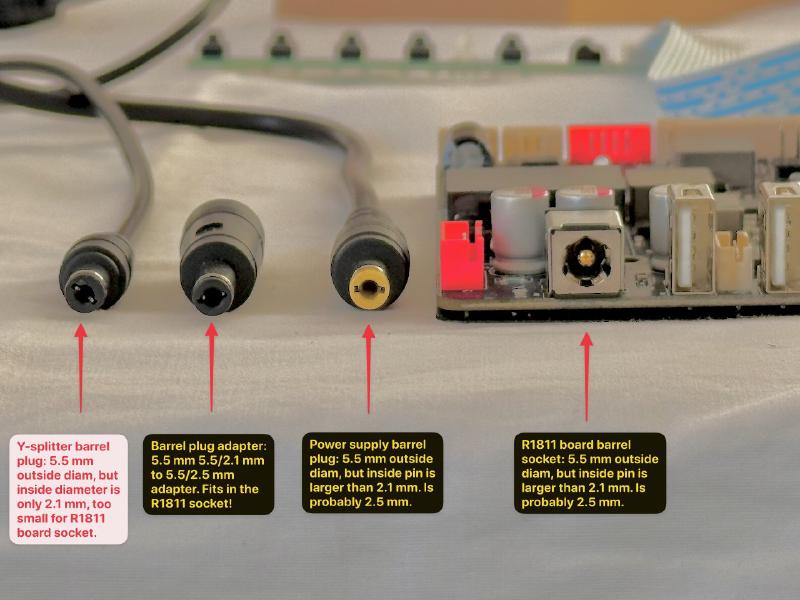
The R1811’s power socket takes a 5.5 mm outside / 2.5 mm inside barrel plug. The “standard” size is 5.5 / 2.1 mm, and that is the splitter I bought. It fit the Stonetaskin brick but needed an adapter for the R1811 socket. I had one in the junk drawer.
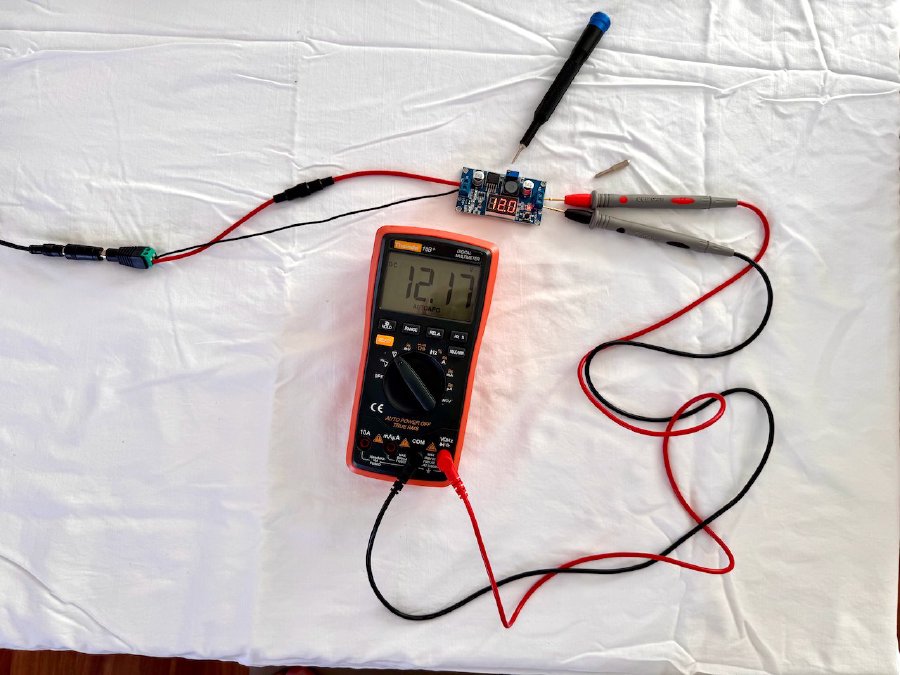
Setting the step-down converter#
The converter is this one.
Where it stands, and what is next#
As of November 2026 the monitor is in daily use as a 5K display. The electronics live inside the iMac case, and the OSD control strip hangs out the back, which works but is not pretty. Still on the list:
- OSD buttons. The plan is to move the keypad into the rear port cutouts using this MakerWorld mount, designed for the 5-key keypad, if mine turns out to be the matching board. Forum member @jag001 did a similar job from scratch, documented here.
- Case fan inlet shroud. A 3D-printed duct between the fan and the rear vent. @Xarli published one on Thingiverse, and there is another make.
- Mounts for the boards and the converter. 3D printed; I have not found ones for the R1811 and DZ-LP0818 that suit my layout.
- Move the IR receiver from the control strip to where the FaceTime camera was, so the remote works from the front.
- A RAM cover, since the Mystery Mac came without one.
The bottom line#
A dead 27-inch 5K iMac is a 120 euro panel with a free case, and for about 330 dollars of boards from Stonetaskin it becomes a monitor that macOS treats as a native Retina display. Buy the R1811 if you want the fewest surprises; check the panel code before you buy the iMac if pink edges would bother you (2017 and later are clean); use a USB-C to DisplayPort cable unless you also buy a power supply big enough to charge your laptop; and read the MacRumors thread before you post in it.
Sources and useful links#
- MacRumors DIY 5K Monitor Success thread, and its WikiPost index of builds.
- @PaulD-UK on wiring and power (#1822)
- @Aiwi on R1811 setup (#822)
- @Kaeslin’s R9A18 project (#1409)
- iFixit logic board replacement guide
- Stonetaskin, the board vendor
- Noctua NA-FC1 fan controller
- Ugreen USB-C to DisplayPort 1.4 cable, tested by many in the thread
- The original write-up: kurtshuler/imac-5k-monitor-conversion on GitHub